Shopping Cart Extended for VirtueMart
While looking for a slightly better shopping cart module for VirtueMart, I found that there are quite a few really chic ones with all the trimmings. Unfortunately, most of them are also quite expensive. They also have a variety of functions that I didn't need at all.
So I thought about which functions I really needed:
- Dropdown
- Deleting single elements
- Displaying pictures
- AJAX
- Adaptability to the page layout in the admin area
- Responsive- and mobile device friendly design
The standard shopping cart module from VirtueMart already brings some of this with it. So why not build on it?
And as I was there, more and more ideas came to me that were implemented directly.
From time to time the reprogrammed something matured more and more into an independent module. And then I had the idea that I should sell it when it's ready. Ideally with an annual subscription, so I will make a lot of money. However, this also has disadvantages. You have to offer support and provide regular updates. Unfortunately, I don't have the time. In addition, I was looking for a cheap or free module myself.
So I made my decision for the one and only right way: It is and always will be free!
Below you will find the download of the latest version, instructions for all functions and tips on how it can be further adapted so that it can be optimally integrated into every shop.
And, because it all takes a lot of time and is a lot of work, I would be very happy to get a coffee for it.
DOWNLOAD
The latest version can be downloaded here. Updates can also be imported using the Joomla update function.
IMPORTANT NOTE: Currently, only Font Awesome icons are used as icons. These can be freely downloaded from https://fontawesome.com/ and integrated into every website. But maybe that will change in one of the next versions and the Font Awesome icons will then be optionally available.
Demo and Examples
USER MANUAL
Installation
The module can be easily installed via the Joomla backend with the following steps:
- Download the ZIP-file.
- Go to Extensions → Manage → Install in your backend.
- Choose the tab Upload package file.
- Drag the downloaded ZIP-file to the gray area or select it via Or browse for file.
- If no errors are displayed, you have successfully installed the module.
Adding Font Awesome Icons
Go to https://fontawesome.com/ and register by clicking on Start for free. Follow the instructions on the page. You will then receive a kit code that looks something like this:
<script src="https://kit.fontawesome.com/xxxxxxxxxx.js" crossorigin="anonymous"></script>Copy the code into the <head> area of your template. Some templates have their own option for this in the settings. Unfortunately not the Vmbeez 3 or Beez 3 template. Here you have to go to Extensions → Templates → Templates and create a so called override.
To do this, click on the template name. On the left select the file index.php. Now look for the <head> </head> area on the right-hand side and paste the copied kit code there. The whole thing could look like this:
?><!DOCTYPE html><html lang="<?php echo $this->language; ?>" dir="<?php echo $this->direction; ?>"><head><meta name="viewport" content="width=device-width, initial-scale=1.0, maximum-scale=3.0, user-scalable=yes"/><meta name="HandheldFriendly" content="true" /><meta name="apple-mobile-web-app-capable" content="YES" /><jdoc:include type="head" /><script src="https://kit.fontawesome.com/xxxxxxxxxx.js" crossorigin="anonymous"></script></head><body id="shadow"><div id="all" <?php if ($this->params->get('change_content_width')) {echo ' style="max-width: ' . $this->params->get('content_width') . 'px"';} ?>>
Then click on Save and close. You have now added Font Awesome Icons to your template.
Activating the module
To activate the module, switch to Extensions→ Modules in the backend menu.
First deactivate the VirtueMart module VM - Shopping cart by clicking the green tick in front of it.
Now search for the module VirtueMart Shopping Cart Extended and click on the X in red circle to activate it.
Then open the module settings by clicking on the module name. The most important settings can now be made here.
Settings
Module
Joomla Settings
The most important settings here are:
Show title
Recommended setting is hide.
Position
Select here under which position in the template you would like to publish the module.
Status
Should be published.
Module-Settings
Module ID Suffix
Module Class Suffix
These two settings are interesting if you have several module instances that you want to address individually using a unique identifier. However, they can usually be left out.
Show product price?
Choose here if product prices should be shown in the shopping cart.
Show product list in cart?
Choose if a product list should be shown in the cart.
Show remove button?
Choose if a delete button should be shown beside each product.
Number of products beside icon?
Choose if the number of products in the cart should be shown on the icon.
Show product images?
Choose if you like to display images in the product list.
Menu Assignment
Module Assignment
Choose on which pages the module should be displayed.
Style-Options
General hint for color selection:
The colors can all be selected as RGBA. This means that transparencies are also possible.
Global style options for the module
Choose CSS-Style
Select a given CSS style here. There are currently three options:
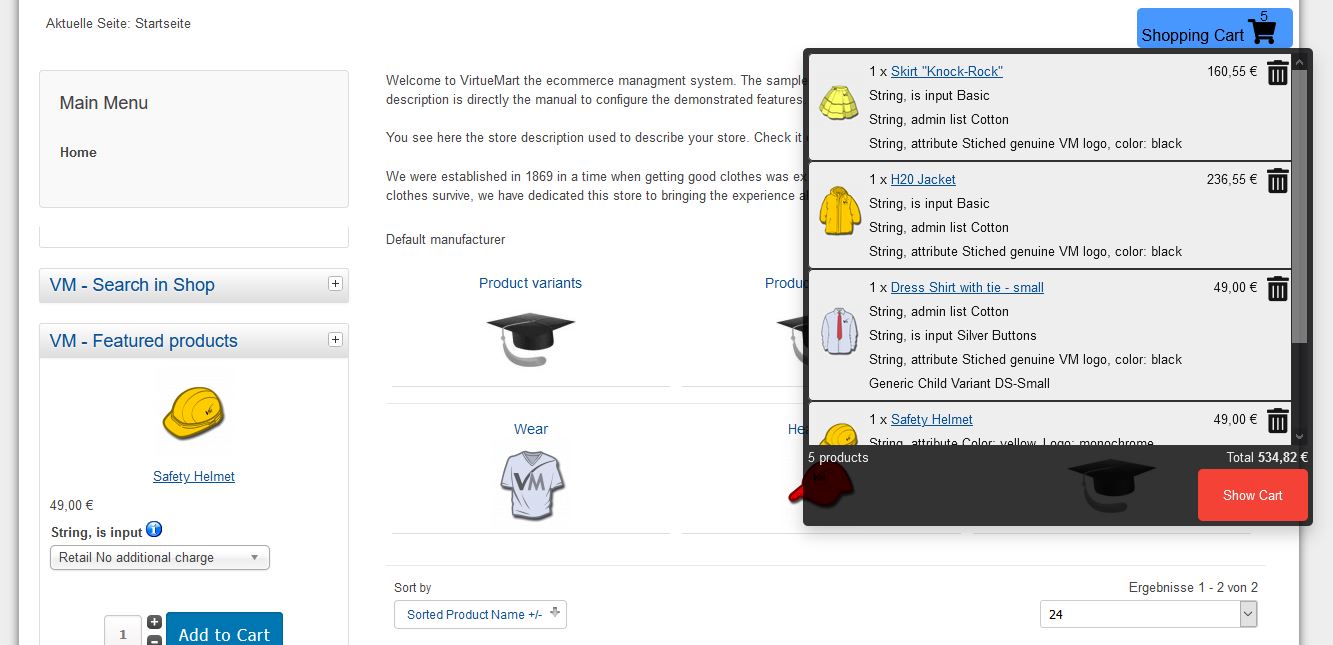
- mod_vm_cart_ext.css (default): Fixes the shopping cart button in the top right corner of the page. On mobile devices it is moved further to the center, since the top right is often the position for the so-called burger menu. The dropdown opens in the desktop view to the left and mobile in the middle.
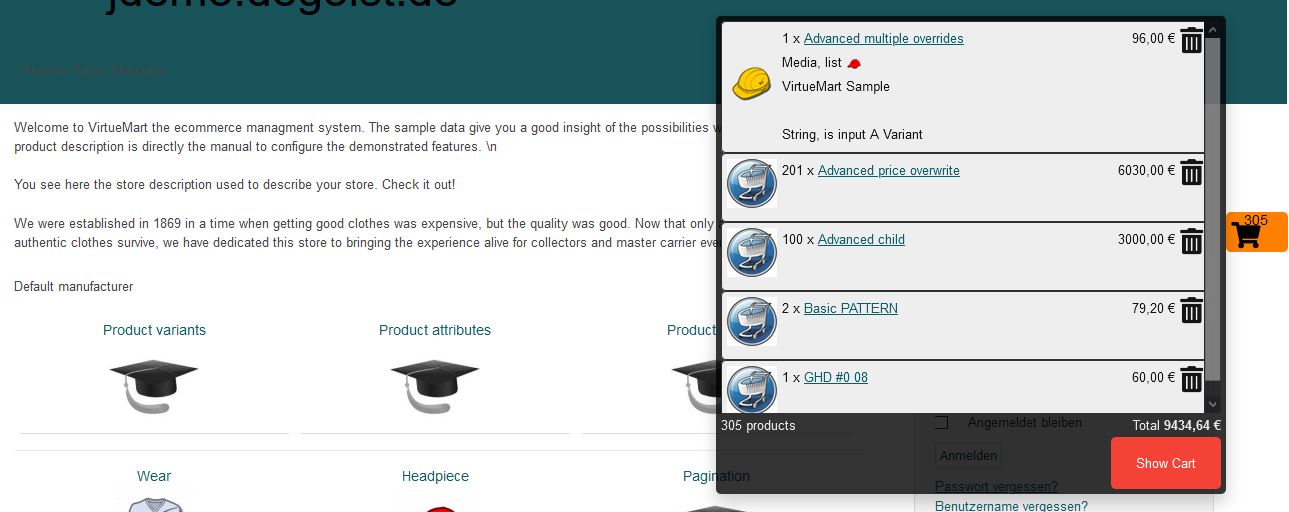
- fixed-right.css: Fixes the shopping cart button in the middle on the right side. The dropdown (in this case dropout) is to the left on the side.
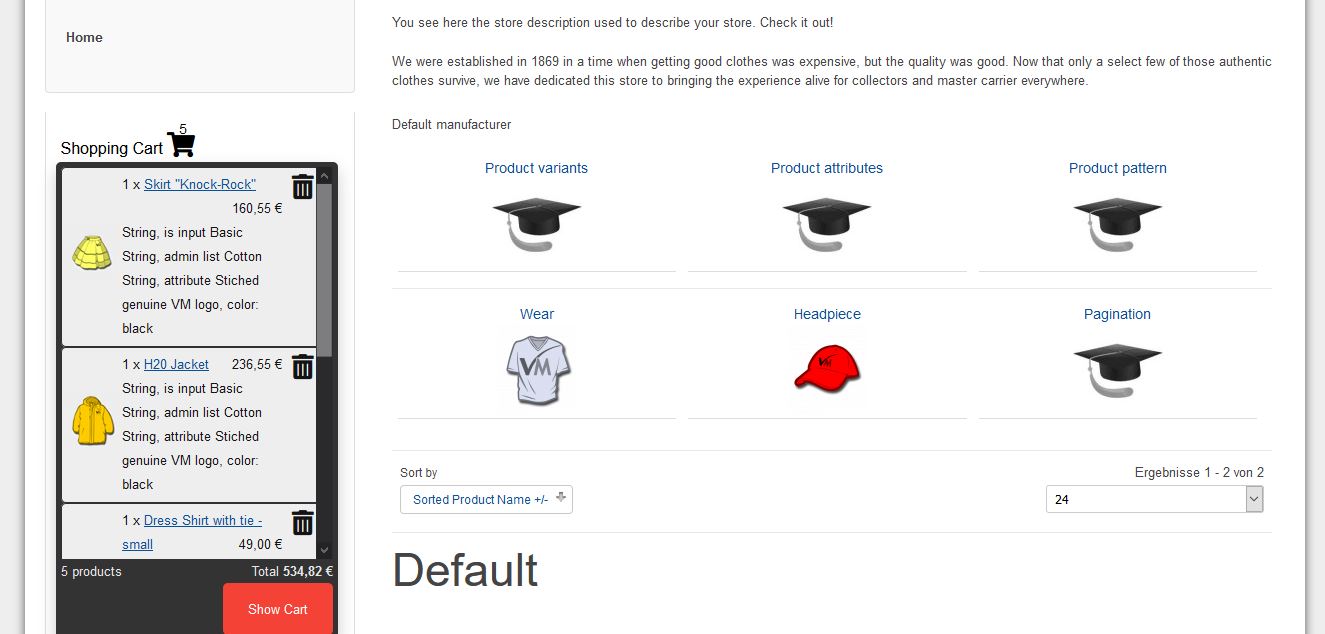
Since the Vmbeez 3 template is not completely optimized for mobile devices, it can happen that the button is not in the picture and only appears by scrolling sideways. Here it is recommended to adapt the template or use a different one. - not-fixed.css: The module is displayed in the position at which it was inserted. The dropdown takes place under the button and moves the following content down.
It is possible to adapt the existing styles. So that they are not overwritten during updates, I recommend that you do not make the adjustments in the original files, but create a copy and save it under a new name. The files can be found in the directory <JoomlaRoot>/modules/modules/mod_vm_cart_ext/css/. Copy your customized files into this directory and they will be displayed in the selection list.
HINT: If the shopping cart module disappears behind a menu or something similar, the Z-index of the classes .vmCartExtWrapper and .vmCartExtModule should be increased. This is already chosen relatively high so that that doesn't happen, but you never know.
For the most part, these CSS files only contain position information.
The visual adjustments can be changed using the following options via the backend.
Round corners of elements?
Select how much you want the corners of the elements to be rounded.
Possible are values between 0 and 30. These can be selected in steps of 5.
Why only 30? Everything above just doesn't look good with this layout...
Appearance of the cart icon
Show Icon and Label?
Select if you want to show an icon, a label or both.
Icon and Label color
Wählen Sie die Text-Farbe für das Icon und Label aus.
Label text for shopping cart icon
Enter the desired text for the shopping cart label here.
Example: Shopping cart
Show as button?
Here you can select whether you want to display icon and label on a button.
The following two options are only relevant if YES is selected here.
Button color
Select the background color for the button.
Button hover color
Select the background color for the button that is displayed when the mouse pointer is over the button.
Appearance of the list
Background color, Text color,
Products Background color, Products Text color,
Products Link color, Products Link Hover color,
Cart Button color, Cart Link Button Hover color
The names should be self-explanatory. Select the appropriate color that you want for the individual elements here.


